Monday, September 20, 2010

A Poll: Guest Room Nighstand Color Dilemma

I am in the process of redecorating our guest room.  Everything will be changing except the bed frame and linens.  I already made over the cube shelf that is used as one nightstand in the room.  I purchased this round pedestal end table on craigslist for $10 to replace the existing nightstand that is in the room.  The current nightstand matches the bed frame perfectly but that is one problem and the fact that it is glass is another problem.  I used to have a passion for glass furniture but now that I have kids I don't like it in my house for obvious reasons.  I want this room to feel beachy, fresh and airy when I am done with it. 

All of that being said, what color do you think I should paint the new nightstand? 


Please vote in my poll.

Sunday, September 19, 2010

Floral {Lamp} Shade Makeover

I have seen a lot of lampshade makeovers and thought they were such a great idea so I decided to make my own.  I used a lamp shade that I already had and purchased a yard of designer's fabric from Jo-Ann for $7. 

Here is my lamp shade before the makeover:


I thought this was going to be an easy project because of one reason; I thought the lampshade was "Drum" shaped but it turns out that it is slightly "Bell" shaped.  I discovered this after I already cut the fabric so needless to say I did not make a template as I should have.  The result of this is that the line where the fabric meets in the back is slightly diagonal and the fabric doesn't lie flat against the lampshade in some areas.  What should have taken me about a half hour to do took one and half hours.  Ultimately the shade ended up looking pretty good and I was able to hide the bad spots because the lamp is in the corner of our living room.  I do have enough fabric leftover to perfect my shade cover but I am going to hold off until I find a good deal on new shade. 


The only supplies I used were a hot glue gun, scissors, measuring tape and iron.  First I measured the height and length of my lampshade and cut my fabric so that the length was two inches longer and the height was one inch longer.  Next, I folded the raw edges of the fabric by half an inch and ironed them down then I hot glued the seams together.  

When I was done with this step my fabric looked like this:


Lastly, I matched the fabric up to the top and bottom of the shade and hot glued it around the edges.  Like I said, this would have been super-EASY if the shade was perfectly drum shaped but since it had a slight taper and was a bit bell shaped I should have created a pattern first.


To see what this lamp base looked like before my makeover click here.

***LINKY PARTIES***Today's Creative Blog***

Thursday, September 16, 2010

A Note to Averi from Arielle

This note that Arielle wrote to Averi {on Averi's new chalkboard table} is so sweet.  It fills my heart with joy to know that Arielle loves her little sister!


Translation: 

"Averi, I want to thank you for being a good sister"

Wednesday, September 15, 2010

Thrift Frame Makeover ~ {Shell} Art

I had leftover paint from my beachy cube shelf makeover so I decided to transform a picture frame that I bought at Goodwill for $3.  It was black but I wanted to brighten it up and use it in my guest room makeover that is still a work-in-process! 


I had this beautiful shell that fit perfectly inside my new blue frame.  First I cut a piece of fabric and spray-glued it to the picture frame backing.  Then I applied the shell to the fabric with 3M heavy duty foam mounting tape.  I love my new framed shell art and the fact that it only cost a few dollars!


I still have about a quart of my custom-made paint left over so I may have another makeover in the works!

***LINKY PARTIES***The Shabby Chic Cottage***Paisley Passions***Just A Girl***

Sunday, September 12, 2010

Kids {Chalkboard} Table

Did I mention how much I love chalkboard paint?!?!  If you have been reading my blog than you know that I am additcted to this stuff.  A good friend of mine, Michelle, gave Arielle a kids table and chairs which Arielle loved and she used for more than three years until she outgrew it. I decided to make it over so that we can use it in Averi's room as soon as we no longer have a need for the rocking chair that is in there now.  For the makeover, I finished the top of the table with chalkboard paint and the rest of it with Sweet Pea {pink} by Rustoleum in a satin finish. I wasn't able to paint the chairs because they need some minor repairs that we haven't done yet. I might even replace them if I can find different ones that are in better shape. 

I am so happy with how the table looks now and wish I had done it sooner!

BEFORE

AFTER

I can't wait for Averi to start enjoying her new chalkboard table!  She has just started pulling herself up onto things {tonight was the first time I found her standing in her crib} so it won't be long.  This table is going to go great in Averi's pink and green bedroom.


***LINKY PARTIES***Today's Creative Blog***The Shabby Chic Cottage***Paisley Passions***Just A Girl***

Friday, September 10, 2010

Laundry Room {Wall} Art

I finally got around to making some wall art for my newly painted laundry room.  It was free, quick and extremely easy to make.  I had a large white frame with matting that I got at a thrift store closing sale and I was itching to use it somewhere in the house.  So I went through my pile of scrapbook paper and found a piece that had bright colors and a busy pattern. I wanted my new art to pop since the walls in the laundry room are dark.  The new wall art is perfect for the space!


***LINKY PARTIES***The Shabby Chic Cottage***Just A Girl***

Thursday, September 9, 2010

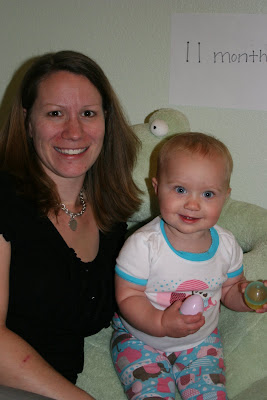
Averi ~ 11 months & Arielle ~ First Day of Kindergarten

Averi is 11 months old! 


Here are some updates:

-Her scooting turned into actual CRAWLING on her hands and knees on the day she turned 11 months old and she is getting quicker as the days go by!  We installed a gate on the main level that blocks her from the basement and upper level stairs.  We still need to install one upstairs but for now we just constantly watch her when we are up there.

-She is still drinking about 22 ounces of formula a day (2 bottles and 2 sippy cups).  She doesn't like to finish her sippy cups at home for some reason but I'm told that at school she drinks it all up!  She is starting to drink small amounts from an open cup at school as well and doing a very good job of it.  The ladies at school even took a picture of her doing it for me.

-Averi is still eating practically everything in sight but now she is doing some funny stuff when she eats!  She likes to sort out her food, especially if I mix veggies with it.  She'll pick them up one by one and put them in her cupholder or drop them on the floor.  She'll eventually eat them (if she hasn't thrown them on the floor) if they are the only thing left on her plate.  She really doesn't like it when I try to feed her because she wants to do it herself but sometimes she'll let me feed her yogurt.

-Still taking one 2 hour nap at school but taking two naps at home on the weekends.  This allows us more flexibility for getting stuff done on the weekends.  She definitely sleeps better at home than she does at school.

-Bedtime is still between 7-7:30.  She is now sleeping with a receiving blanket AND her froggy stuffed blanket.  She gets a 6 ounce bottle at bedtime and doesn't cry at all when I put her down if she is tired.  I'm going to cut that bottle out when she starts drinking real milk and there will be no more bottles for Averi.  She almost always wakes up at 6 am and talks to herself in her crib until I get her out at 6:15.

-She is wearing 18 to 24 month clothes but since she started crawling in the past week she has started noticeably slimming down.  She no longer has "knee rolls" and her "back rolls" are starting to dissapear also.

-She is starting to try to pull herself up onto things but is not very steady at all and always has one of her feet turned sideways when she is standing.

-Averi loves holding stuff in her hands, especially bouncy balls and plastic eggs!  She is very good at playing ball too.  Some other things she loves are splashing in the bath (a lot), playing peek-a-boo, swinging on the playground, chasing the dogs, BITING (trying to nip this one in the bud but she thinks it's hilarious when she bites and I say "no"), kissing with her mouth wide open which usually turns into biting.

-Averi doesn't like having stuff taken away from her at all!  Or waiting for her food while she sits in her high chair.  These two things make her cry...a lot.  She also gets pretty fussy when she is tired at which point she tosses her head back and if she is sitting on the floor she'll bring her forehead to the ground and cry. 

-Funniest thing she does is say "DOG DOG" whenever she hears someone calling for the dogs (which means she knows their names) or when she sees one of them.  She isn't really saying any other words at this point other than Mama, Dada and Ball.  I thought for a while she was saying Sister but I'm not certain of it now.  She sure does like to babble a lot though especially in the car!

********************************************************************************
Arielle started Kindergarten!


-She hurt her big toe the first day of school, on the second day she fell on the rocks and got a big bruise on her thigh and a cut on her elbow and on the third day she bumped her head and got a big bump and bruise.  Other than that things are going well and she is really enjoying it!  Tonight she did her first "Grouch" homework page.

-Arielle has been writing her own stories lately and she LOVES to read books.  We have been going to the new library down the road so she can get a variety of books to read. 

-Her "boy" friend Levi from Pre-K didn't move up to Kindergarten but she still gets to see him when they are playing outside.  I wonder how long it will be before she gets a new crush in the Kindergarten class!


Time seems to be flying by soooo fast...

~Desiree~

Tuesday, September 7, 2010

Beachy {Cube} Shelf Makeover

The playroom makeover has been put on hold until I can actually take pictures without toys scattered all over the floor!  Seriously, I am not complaining because I am so happy that my girls are finally enjoying the space but keeping it clean is a whole different story.  Fortunately I was able to complete another project this weekend which I have been waiting four years to do.  I got inspired to do this project from seeing some pretty furniture makeovers at a couple of my favorite blogs,  Nikki's Nacs and From House to Home.

This is my completed project:


Four years ago I purchased the cube shelf that I am using as a nightstand in our beach guest room from a furniture clearance outlet for $20 and have been wanting to paint it ever since.  I decided to do this makeover project at the last minute and didn't want to spend any more money than I had to.  Since I already had some blue paint left over from painting our master bedroom and bathroom I decided to mix my own color.  The blue is called Ocean Kiss from Behr and I mixed it about half and half with Wishiper White from Glidden which is the color of the trim in our house.  The only thing I had to purchase for this project was a quart of primer and a roller so the total spent was $10.


First, I sanded the cube shelf down with my mouse sander to get a smooth finish all over.  Then I painted two coats of Kilz primer and waited for it to dry before I painted two coats of my newly created color blue.  I could have unscrewed the shelves in the middle since they were held together with small brackets but I was too lazy so I just painted over the hardware.  After the paint was dry I was ready to distress it.  I used my mouse sander again to really get through the layers of paint and concentrated more on sanding the edges.  I love how the primer shows through in some spots and in other spots it's worn down to the wood.  It looks like this is a piece of really old furniture that has been worn over time which is exactly what I was trying to do. 


The brown linen curtains and lamp shade are new purchases for this room.  I plan on redecorating the rest of the room as well with handmade wall art and a wicker chair makeover. 


Friday, September 3, 2010

A Letter to the Tooth Fairy

Arielle lost her first baby tooth about a month ago and I mean that literally.  She was on a field trip and tried to open her pudding with her and teeth which made the tooth fall out.  Apparently everyone including her teachers looked for the tooth but it was nowhere to be found.  At the suggestion of one of her teachers, Arielle wrote this letter to the Tooth Fairy explaining why she did not have her tooth to put under her pillow {or in her tooth pillow that hangs from her bed post as the case may be}:


Her spelling is pretty good for being five and not getting any help but for those of you who need a translation here it is:

Dear Tooth Fairy,

My tooth fell out and I'm not sure if you know or not or if you saw or not and I hope you know.

Love,
Arielle

The letter worked and the Tooth Fairy left Arielle a very generous amount of $5! 

Good thing I remembered to take a picture of the letter before the Tooth Fairy took it away ;-)


Here is a picture of Arielle with her newly missing tooth.  She has three more loose teeth on the bottom and her new one has already grown almost in full!


~Desiree~

Wednesday, September 1, 2010

A BIG Memo Board

The memo board is complete and I love how it turned out!  We haven't hung it up in the playroom yet but as soon as we do I'll reveal the playroom decor makeover. 


I made this memo board from scratch using a large framed poster that someone had given to me {as usual I forgot to take a before photo}.  The frame started out black so I spray painted it white.  It took several coats which totaled two cans of spray paint.  I purchased the fabric and ribbon from Jo-Ann's and already had the batting on hand {leftover from my days of quilting which I miss}.  I cut the batting and fabric so that it would fit around the foam poster board that I had removed from the frame before I painted it.  Next I wrapped the fabric over the batting around the edges of the poster board, making sure to work my way from the center out to the corners on each side {this prevents wrinkling of the fabric}.  I used thumb-tacks to adhere the fabric and batting to the poster board but when I finished I ended up going around the entire thing with staples.  The ribbon was little more difficult and would be rather difficult to explain but I'll give it a shot.  First Zak did some math that I haven't thought about since high school {A squared plus B squared equals C squared} then we started stapling ribbon around the edges of the poster board using a ruler and checking our measurements often.  We did 3 inches in between each ribbon.  When we were done attaching the ribbon I went around the back of the board again and applied a TON more staples for extra security.  Lastly, I put packing tape all around the back of the board to cover the staples and thumb-tacks. 


Here is a breakdown of the costs to make the memo board:

-BIG poster frame and board = $0
-2 cans of spray paint = $9
-1 yard of fabric = $5
-1 yard of batting = $0
-2 spools of ribbon = $4

Total cost to make BIG memo board = $18


***LINKY PARTIES***The Shabby Chic Cottage***Today's Creative Blog***The Shabby Nest***

~Desiree~